
I’m still not ready to post a first long update on our new garden. When you get a garden at the beginning of March, it’s really a fight against time to get everything ready at the start of the gardening season. I’m therefore choosing to focus on getting things ready instead of posting long updates about the garden now. Luckily, I have much content that I haven’t posted yet. This is content related to our old garden. Things that I tried out and worked, and that I’m now ready to share. Today a post on how to grow pumpkins successfully on a no-dig bed, covered with cardboard.

It’s actually a very good idea to grow pumpkins on a no-dig bed. We found this out in 2014 when I was so disappointed by the returning weeds, that I decided to cover one side of the garden with cardboard. I grew pumpkins there (along with other things). Compared to the (non-) harvest of the year before, we had a huge bumper crop. Our conclusion was that this was a good way to grow pumpkins, when you are starting a garden and you are still fighting a battle against weeds.

There are a few things to keep in mind when you are growing pumpkins on cardboard. First of all, ideally you place the cardboard on top of your piece of land early in the season or at the end of a season even. That is, if possible. If it isn’t possible, do it whenever you can. The second thing is that you will need fairly big seedlings to plant. Direct sowing isn’t recommended with this method. You need strong plants, that are able to compete with the remaining weeds. The last thing to remember is that mulching is very important when you use a cardboard method. Mulching with both compost and straw.

So how do you start?
You start by collecting immense amounts of cardboard. That year I used cardboard that I had kept from the big things that we bought in stores. Other years I have collected cardboard from supermarkets. Remember that you only want to use brown unprinted cardboard. Removing all the tape. I often do leave the printed paper stickers on the boxes. If you are less lazy, you can remove those too. Now you cover the piece of land that you want to use with the cardboard. People say that it’s best to wet the cardboard first. But I find that too messy, so I don’t do that. Ideally you choose to do this job a day before the rain comes.
Now that the cardboard has covered the piece of land fully (make sure that you can’t see anything from the layer below). You can start adding compost. Depending on how much compost you have, you can choose how much you want to add. If you have a lot of compost, you add a thick layer (10cm for example). If you don’t have much compost (like us), you just add as much compost to cover everything. Ideally you won’t see any cardboard now.
Next is the straw or cut grass or dead leaves. Whatever you have at hand. Cover the compost with a layer of mulch. You can now leave this bed to rest for a few months. Ideally at least three months. In the meantime you can grow your seedlings.
As soon as your seedlings are +15cm and the weather permits planting out, you can start with the fun part. Putting some life into your garden. What you do now is that you create holes 20x20x20cm in your bed. You fill the holes with fresh compost and maybe a bit of manure. Plant the pumpkin seedling into that compost. You can plant the plants about 80cm apart. That’s what I do, because I like to overgrow the piece with leaves of the plants. Water them thoroughly the first time.
That’s it. You can now leave the plants to grow. Keep an eye on them on how much water they need. We had a watering system set up on top of the mulch. Just a soaker line that we used to put on twice a week or so. During the season I also place more mulch on top of everything (including the soaker line). This way the pumpkin plants don’t dry out.
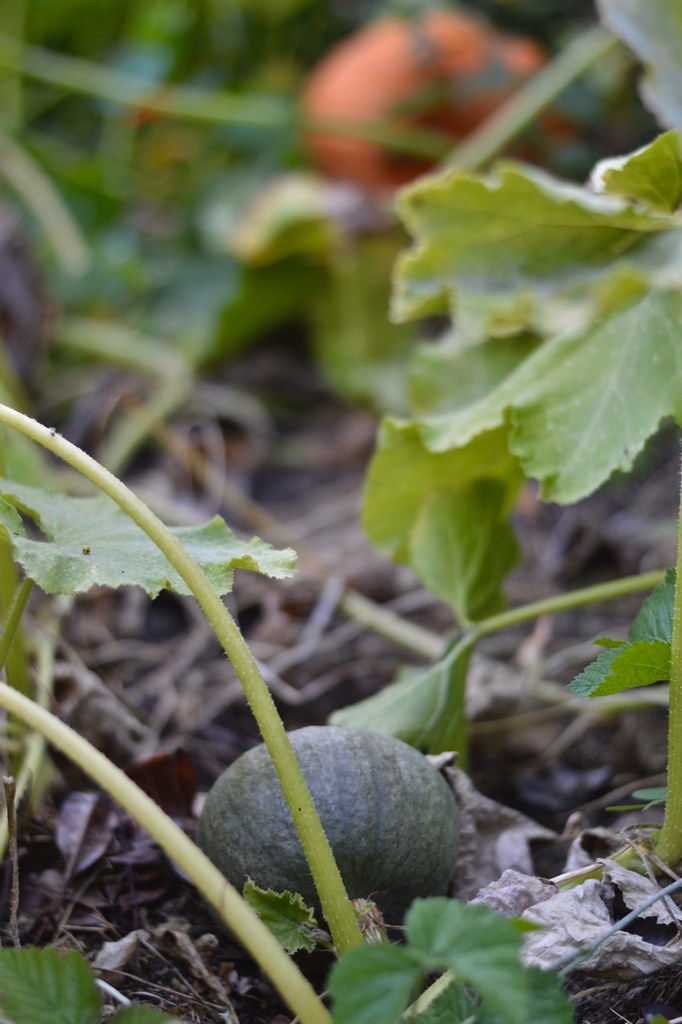
When the pumpkins start forming, it’s a good idea to place them on top of a piece of stone or something else so that they don’t start rotting due to a wet surface. You wait with harvesting until the stem gets a cork like surface. The longer you leave them on the field (without letting them rot), the longer you can keep them in storage! Keep that in mind. We are now in April and we are still eating last years pumpkins. I think we will still be eating pumpkins in July. By the time August comes, we will have new pumpkins. It’s really a favourite, when it comes to self-reliant living.


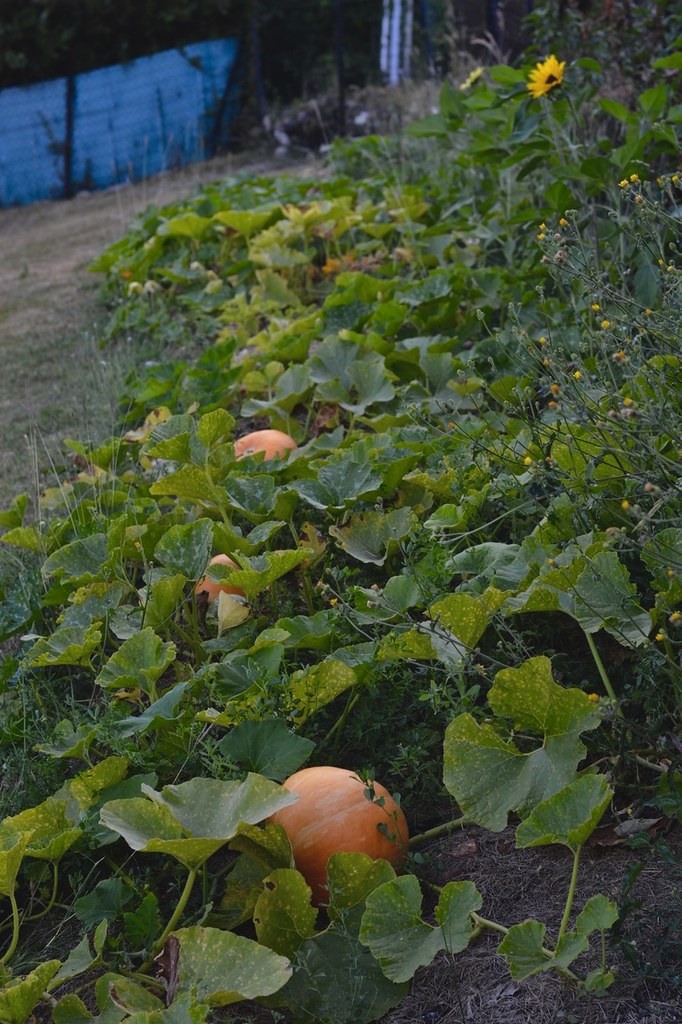

Just as a closing remark. We harvested about 40 pumpkins from this small bed that you see below. I didn’t do any weeding. As soon as the weeds reach this stage shown below, you will already have full-grown pumpkin plants, and most of them will be harvested. You won’t have to help them compete with the weeds anymore. The weeds are no problem at this stage. I knew also that we would move away from that house a few months later, so this was also a perfect way to leave the piece of land as it was before. As if nothing had happened. A perfect example of using permaculture principles while renting a house.
Another plus of this way of gardening is that your soil will improve as you are adding both dry organic material (cardboard, straw) as well as compost. So if you do want to use the piece of soil again in the years that follow, you can do that more successfully. You will have less weeds and better soil, with limited work.
Let me know if this method works for you too, if you try it out! And remember: sow, grow, harvest and feast!

The Author


April 21, 2020
Hi, thanks for making this post. Just wondering, dDd you make holes in the cardboard to plant the pumpkins?
April 21, 2020
Hi there,
Thank you for your question! Yes, I definitely made holes in the cardboard. But you can also place the cardboard around the pumpkin base, that way you don’t have to cut. If you have a ton of compost, then you can choose to plant them in the top layer of compost and let nature decompose the cardboard over time so that the pumpkin can root deeper over time. But my top compost layer is never thick enough to use that method.
I hope it helps. Good luck growing!
Marta